
In this tutorial, we will see how to create a Collaborative Editorial so that all employees in your company can participate by submitting content to be displayed on Corporate TV.
We will create an example to make the tutorial easier to understand.
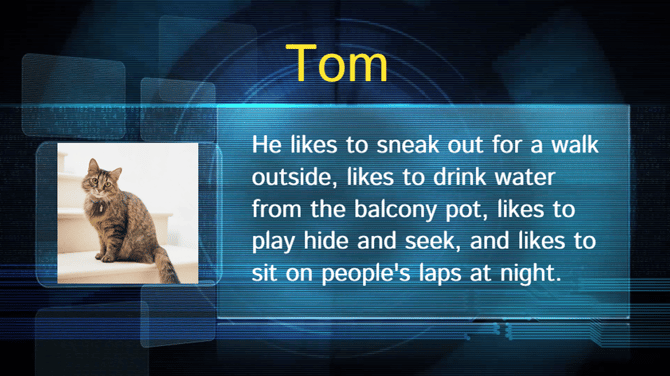
Let's assume a campaign will be created for employees to showcase their PETS on Corporate TV, displaying their names, photos, and what they like to do.
We will use the template below as an example:
And imagine employees receiving the following screen by email to submit their content:
1 - Creating a Collaborative Editorial
- Access Manager and go to the Content tab, under Editorials;
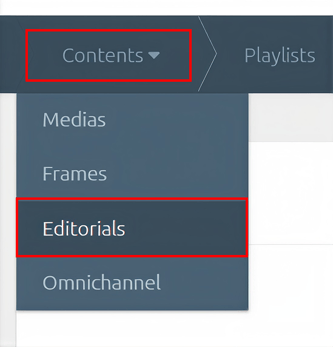
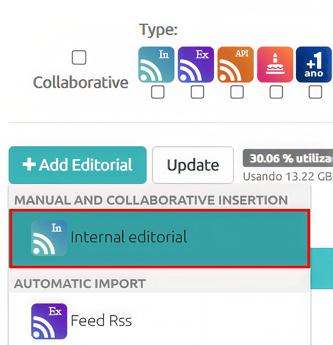
- In the Editorials tab, click the +Add Editorial button and select Internal Editorial;
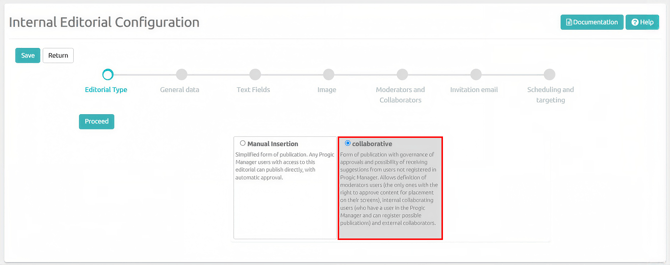
- On the Internal Editorial Configuration screen, the first step is to select the Collaborative Editorial Type and click the Continue button;
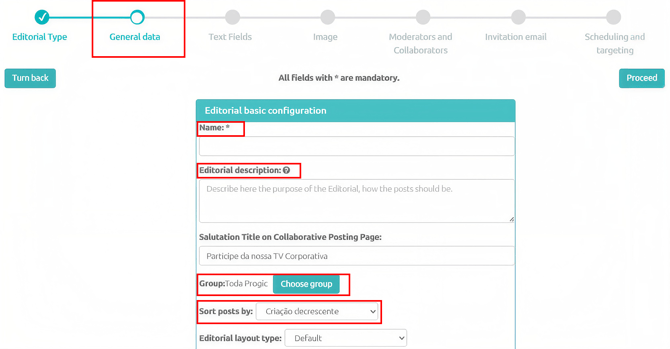
- In the General Information step, you must fill in:
- Name: this will be the name of the Collaborative Editorial.
- Editorial Description: describe what type of post should be created for this editorial. If it is a collaborative editorial, this description will be sent in the invitation email to contributors and will also appear on the content creation screen for external collaborators.
- Group: select the group that will have access to this Editorial's content and will also be able to create posts within it.
- Sort posts by: by default, this setting is always configured as Descending Creation, which means the most recent/new posts will always appear at the top/first in the template (similar to some social networks), unless there is a specific Display Date/Scheduling configuration, which we will cover later in this tutorial.
- Advanced Settings: no changes are required in this field when following this tutorial.
- To save the settings, click the Continue button.
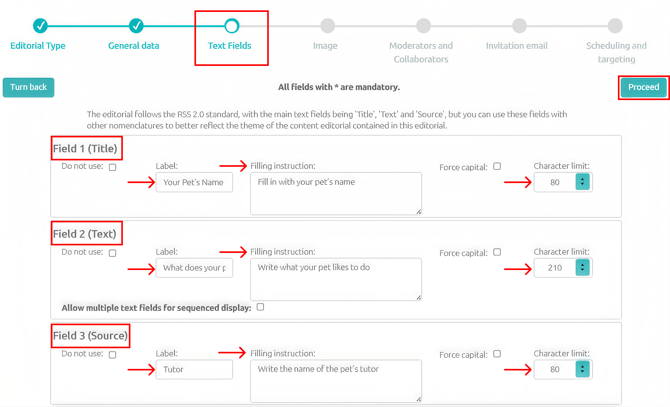
- In the Text Fields step, we will configure the fields that employees will fill out, along with the appropriate instructions to avoid errors in submitted content:
- In Field 1 (Title), we will change the label, add filling instructions for the employee, and limit the number of characters.
- In Field 2 (Description), we will change the field label, add instructions for filling out the content, and limit the number of available characters.
- In Field 3 (Source), we will change the field label, add instructions for filling in the content, and limit the number of available characters.
- These configurations are designed to help employees complete the fields correctly and avoid confusion, as shown in the example we are following.
- To finish configuring this step, click the Continue button.
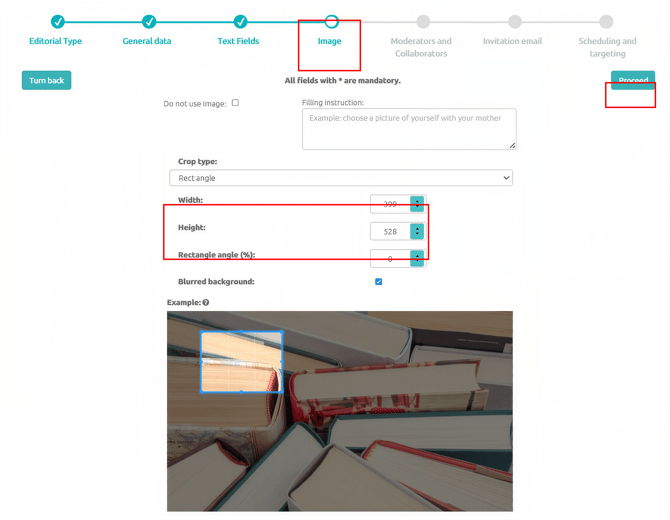
- In the Image configuration step of the Collaborative Editorial, you can configure the image size that may be used in the template:
- For templates that do not use images, you can select the "Do not use image" option.
- In the filling instructions field, you should provide a short text instructing the employee, as shown in our example.
- In the Width and Height parameters, configure the image size that will be used in the template. By default, these fields are already set to 400x400 pixels.
- In the Circular option, you can enable circular image cropping (the default crop is square or rectangular). This option works best if the template also uses a circular image area.
- In Rectangle Angle (%), you can soften the image borders by rounding the corners. The higher the value, the more rounded the corners will be.
- Blurred Background: this option is enabled by default to apply a blur effect to areas not filled by the image when it does not have the correct size, creating a visually pleasing effect on the TV display.
- Click the Continue button to finish this step.
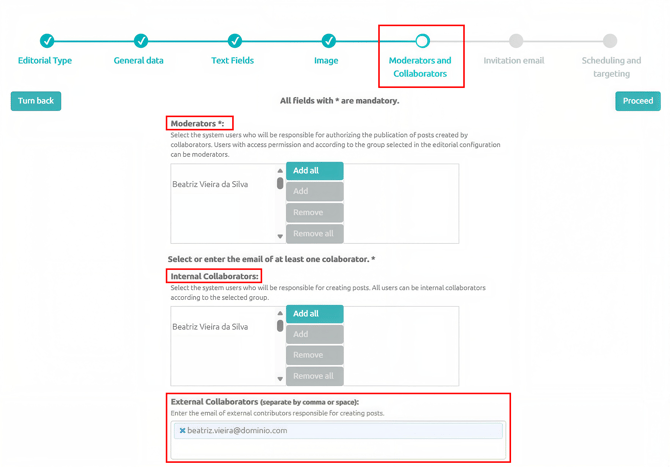
- In the Moderators and Collaborators section, you must configure the users responsible for moderating submitted content, which users can access Manager, and which email addresses will receive invitation emails to create content for the Collaborative Editorial.
- Under Moderators, select the users with Manager access (already registered in the system) who will moderate and approve submitted content.
- Under Internal Collaborators, select users with Manager access who will be able to access the Editorial to create or edit posts.
- Under External Collaborators, register the list of email addresses for everyone who should receive the invitation email to submit content.
- Click the Continue button to move to the next step.
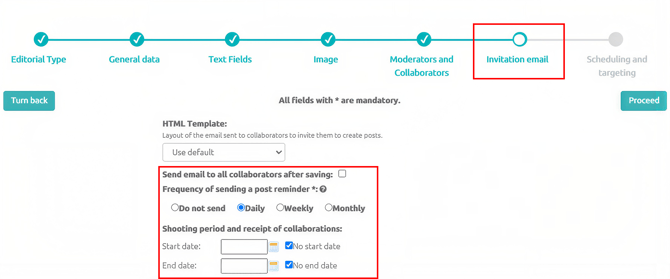
- In the Invitation Email step, we will configure the email employees will receive to submit content.
- In HTML Template, leave the default template selected for now.
- In Send email to all collaborators after saving, if enabled, collaborators will receive the invitation email as soon as you finish configuring and save the Editorial.
- In Send email only to new collaborators after saving, the system will send emails only to new collaborators registered in the previous step.
- In Post reminder frequency, configure how often Manager will send reminders requesting content submissions: Daily, Weekly, or Monthly.
- In Submission and contribution period, you can configure a fixed period (Start Date and End Date) for reminder emails and the deadline for collaborators to submit content.
- Click Continue to proceed to the next step.
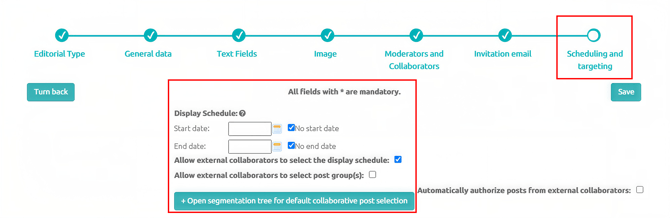
- In this configuration step, Scheduling and Segmentation, we will finalize the Collaborative Editorial settings.
- In Display Scheduling, you can define the period during which Editorial content will be displayed. By default, the system selects No Start Date and No End Date so content is displayed indefinitely.
- In Allow external collaborators to select display scheduling, the same start and end period configuration will be sent in reminder emails so external collaborators can define it.
- Allow external collaborators to select the post group(s): when enabled, external collaborators will see the segmentation tree and will be able to choose which unit the submitted content should be displayed to.
- To finish creating/configuring the Collaborative Editorial, click the Save button.
- The Collaborative Editorial is now ready to receive content from collaborators.
Please remember that for the content to be displayed in the schedule, you must link this Editorial to a Creative template, which must be done under Content > Media by clicking the Creative button.
You can refer to the tutorial at the following link to link the Collaborative Editorial to a Creative template: How to Assign an Editorial to a Creative Template